Importing your cellar
This guide covers what happens once you hit upload — column mapping, error handling, and the after-import summary.
What you'll need
- A
.csvfile in the defined format — under 1,500 rows and 5 MB. - An empty collection in Moments in Vine. The importer won't run otherwise.
Step-by-step
Upload your file
From the empty-collection screen, drag and drop your CSV or click to choose it. We parse it in your browser — nothing is saved until you confirm.
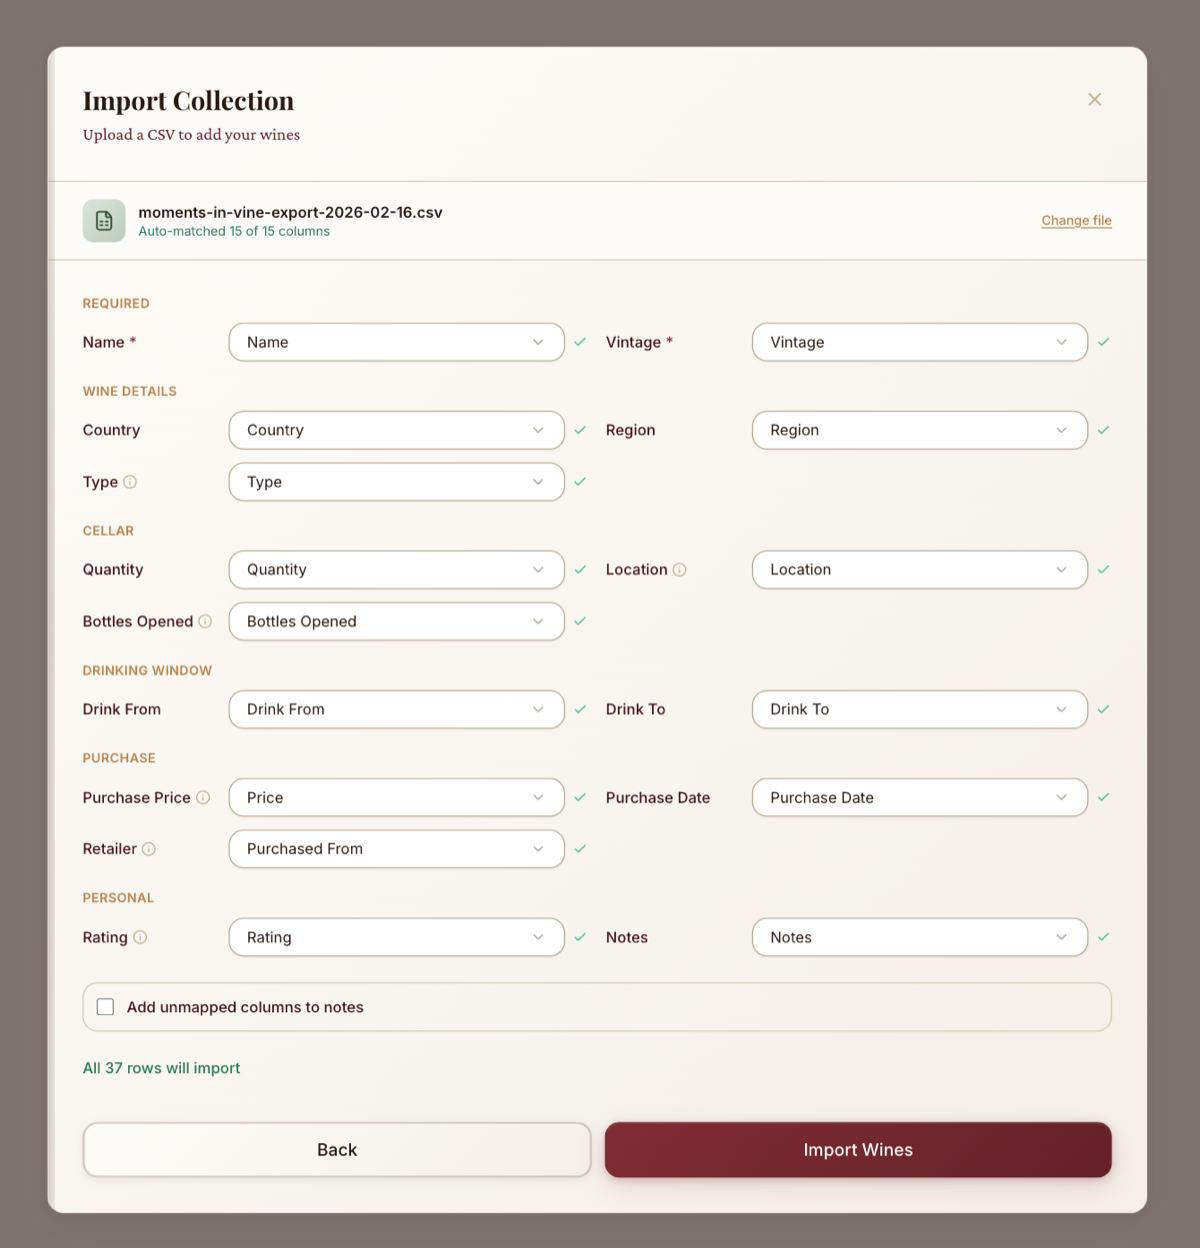
Map your columns
We auto-detect headers from Vivino, CellarTracker, Wine-Searcher, and most spreadsheets. You'll see a preview of the first few rows with each column mapped to a Moments in Vine field. Adjust anything that isn't right — at minimum, Name and Vintage must be mapped to continue.
Decide about unmapped columns
Columns that don't match a known field can be appended to Notes as Header: value lines so no data is lost. Otherwise the raw values are archived on your profile.
Confirm and import
Click import. Most files process in a couple of seconds; large ones may take up to a minute.
How errors are handled
Row-level errors are skipped
If a row has a vintage of "next year", for example, we skip just that row and import the rest. Skipped rows appear in the summary with reasons.
Invalid optional fields don't kill the row
If Name and Vintage are valid but an optional field (e.g. a rating of 15/10) isn't, we import the wine and drop just that field. Only invalid Name or Vintage causes the whole row to be skipped.
Duplicates within your CSV
Rows with the same Name and Vintage are imported but flagged as warnings so you can decide later whether to merge them.
After the import
You'll see your imported collection and can fine-tune drinking windows, locations, and anything else. Any drinking windows you didn't provide are estimated by our prediction engine.
Next: start importing
Sign up and upload to run your first import. If you need to double-check your file first, revisit Getting your cellar ready to import.